


If you have a Raspberry Pi 5 sitting in the homelab and you are wondering whether it can handle a Minecraft server through Pterodactyl in Docker, the short answer is yes. The more honest answer is yes, but this is definitely a fun project more than a serious production setup.
That matters, because a few of the shortcuts here are fine for a home lab experiment and not something I would recommend for a public, high traffic game server. Still, if your goal is to learn Pterodactyl, get Wings working, and launch a manageable Minecraft instance from a clean web dashboard, this setup absolutely gets the job done.
Before we dive in, here are links to the products used in this article.
– Raspberry Pi 5 16gb: https://t4g.link/raspberrypi
– 128gb MicroSD Card: https://t4g.link/128gbmsd
– Argon ONE V5 Case: https://t4g.link/argonv5
– USB C Card Reader: https://t4g.link/usbccr
🧰 What this setup is actually doing
The goal is to run Pterodactyl inside Docker on a Raspberry Pi 5, then use it to deploy a Minecraft server. That means a few moving parts:
- Pterodactyl Panel for the web interface
- Wings for the node side game server management
- MariaDB or MySQL compatible database for panel data
- Docker Compose to orchestrate the containers
- Minecraft Paper as the server software that works with ARM
There is one big caveat right up front. Pterodactyl was not really built with this exact Docker on Raspberry Pi approach in mind, so expect a little friction. There are a few manual fixes along the way, especially around database tooling and file permissions.
⚠️ Before you start
Here is the expectation setting nobody likes but everybody needs.
- This works best as a home lab project.
- Performance on a Raspberry Pi for Minecraft is limited.
- It is fine for testing, learning, and casual use.
- It is not the right choice for a heavily used public server.
You will also want SSH access to the Pi and a working Docker environment already in place. If you are shopping parts, the setup here used a Raspberry Pi 5, and a decent microSD card helps too.
🖥️ Step 1: Enable cgroups on the Raspberry Pi
The first thing the Pi needs is proper cgroup support so Docker and the containerized game tooling can manage resources correctly.
Edit the Raspberry Pi boot command line file and append the cgroup settings at the end of the existing line.
sudo nano /boot/firmware/cmdline.txtAdd the cgroup parameters to the end of that single line:
cgroup_enable=cpuset cgroup_enable=memory cgroup_memory=1Save the file, then reboot.
sudo reboot now📁 Step 2: Create the Pterodactyl workspace and prep permissions
After the Pi comes back up, create a working directory. This setup uses /opt.
cd /opt
sudo mkdir pterodactyl
cd pterodactyl
Next, create a setup script that prepares directories and permissions so the Docker containers and the host can actually talk to each other properly.
sudo nano setup.shThe script content used here creates the required directories and applies permissive ownership. Again, that is acceptable for a home lab experiment, but not what I would call hardened.
#!/bin/bash
# Create directories
mkdir -p panel mysql redis wings /var/lib/pterodactyl /run/wings

# Set Ownership (81=Panel, 999=Database, root=Wings)
chown -R 81:81 ./panel
chown -R 999:999 ./mysql
chown -R root:root ./wings /var/lib/pterodactyl /run/wings

# Set Permissions
chmod -R 755 ./panel ./wings
chmod -R 777 /var/lib/pterodactyl
echo "✅ Directories and permissions prepared."
Run the script once it is saved.
sudo bash setup.sh🐳 Step 3: Build the Docker Compose file
Now for the core of the setup. Create your Docker Compose file.
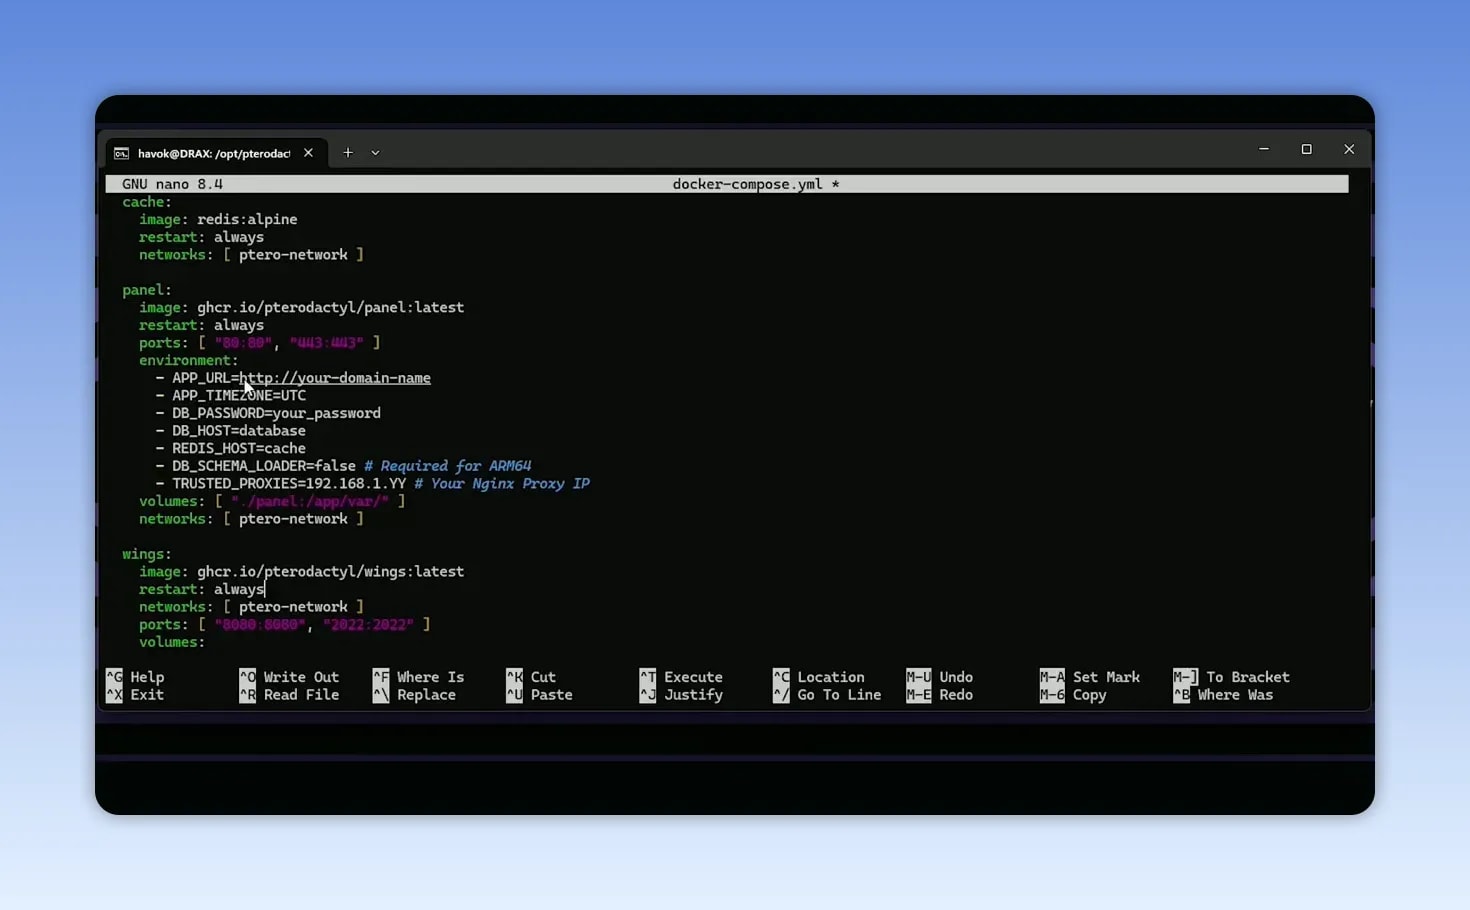
sudo nano docker-compose.yamlThis compose stack includes the network, the database, the panel, and Wings. The key values you need to customize are:
- The database user password
- The database root password
- The app URL, which can be your local IP or domain
- The trusted proxy value if you are using a reverse proxy
If you want a quick password for the database fields, a password generator makes that part easy.
networks:
  ptero-network:
    driver: bridge

services:
  database:
    image: mariadb:10.11
    restart: always
    command: --default-authentication-plugin=mysql_native_password --ssl=OFF
    volumes:
      - ./mysql:/var/lib/mysql
    environment:
      - MYSQL_DATABASE=panel
      - MYSQL_USER=pterodactyl
      - MYSQL_PASSWORD=your_password
      - MYSQL_ROOT_PASSWORD=your_root_password
    networks:
      - ptero-network

  cache:
    image: redis:alpine
    restart: always
    networks:
      - ptero-network

  panel:
    image: ghcr.io/pterodactyl/panel:latest
    restart: always
    ports:
      - "80:80"
      - "443:443"
    links:
      - database
      - cache
    volumes:
      - ./panel:/app/var/
    environment:
      - APP_URL=http://your-domain-name
      - APP_TIMEZONE=UTC
      - DB_PASSWORD=your_password
      - DB_HOST=database
      - REDIS_HOST=cache
      - DB_SCHEMA_LOADER=false
      - TRUSTED_PROXIES=192.168.1.XX # Your Nginx Proxy IP
    networks:
      - ptero-network

  wings:
    image: ghcr.io/pterodactyl/wings:latest
    restart: always
    networks:
      - ptero-network
    ports:
      - "8080:8080"
      - "2022:2022"
    volumes:
      - /var/run/docker.sock:/var/run/docker.sock
      - /var/lib/docker/containers:/var/lib/docker/containers
      - ./wings:/etc/pterodactyl
      - /var/lib/pterodactyl:/var/lib/pterodactyl
      - /run/wings:/run/wings # Required for machine-id mount
    privileged: true
Once the file is ready, start the stack in detached mode.
sudo docker compose up -dAt this point Docker will pull the images and launch the containers. Depending on your connection, this may take a few minutes.
🔎 Step 4: Check the containers and fix the database client issue
When the containers come up, they may look healthy at first glance, but there is a known issue. The panel image does not include the MySQL client tooling needed for the database setup in this workflow.
That means the next move is to install the client inside the panel container.
docker compose exec -u root panel apk add --no-cache mysql-clientAfter that, copy the schema into the right place and import it.
sudo docker cp $(docker compose ps -q panel):/app/database/schema/mysql-schema.sql ./mysql-schema.sqlThe original process uses a long command for the schema copy and then another for the import. The important detail is that the database password in the import command must match what you set in the compose file.
sudo cat ./mysql-schema.sql | docker compose exec -T database mariadb -u pterodactyl -p'your_password' panelIf you get an access denied error here, it is usually because the password in the command does not match the password you configured earlier. That is annoying, but it is also a pretty normal thing to run into in a setup like this.
Once the database side is sorted out, run the panel migrations and seed the default data.
docker compose exec panel php artisan migrate --seed --forceThis step loads the eggs used by Pterodactyl for different server types, including Minecraft and other game server options.
👤 Step 5: Create the first admin account
With the panel database initialized, create the first administrative user.
docker compose exec panel php artisan p:user:makeEnter the email, username, first name, last name, and password when prompted. Keep that email handy because you will need it again when assigning ownership of the Minecraft server later.
🌐 Step 6: Log into Pterodactyl and create a location
Open the panel in a browser using the IP address or domain you configured earlier. Once you log in, the dashboard will be pretty empty, which is exactly what you should expect.
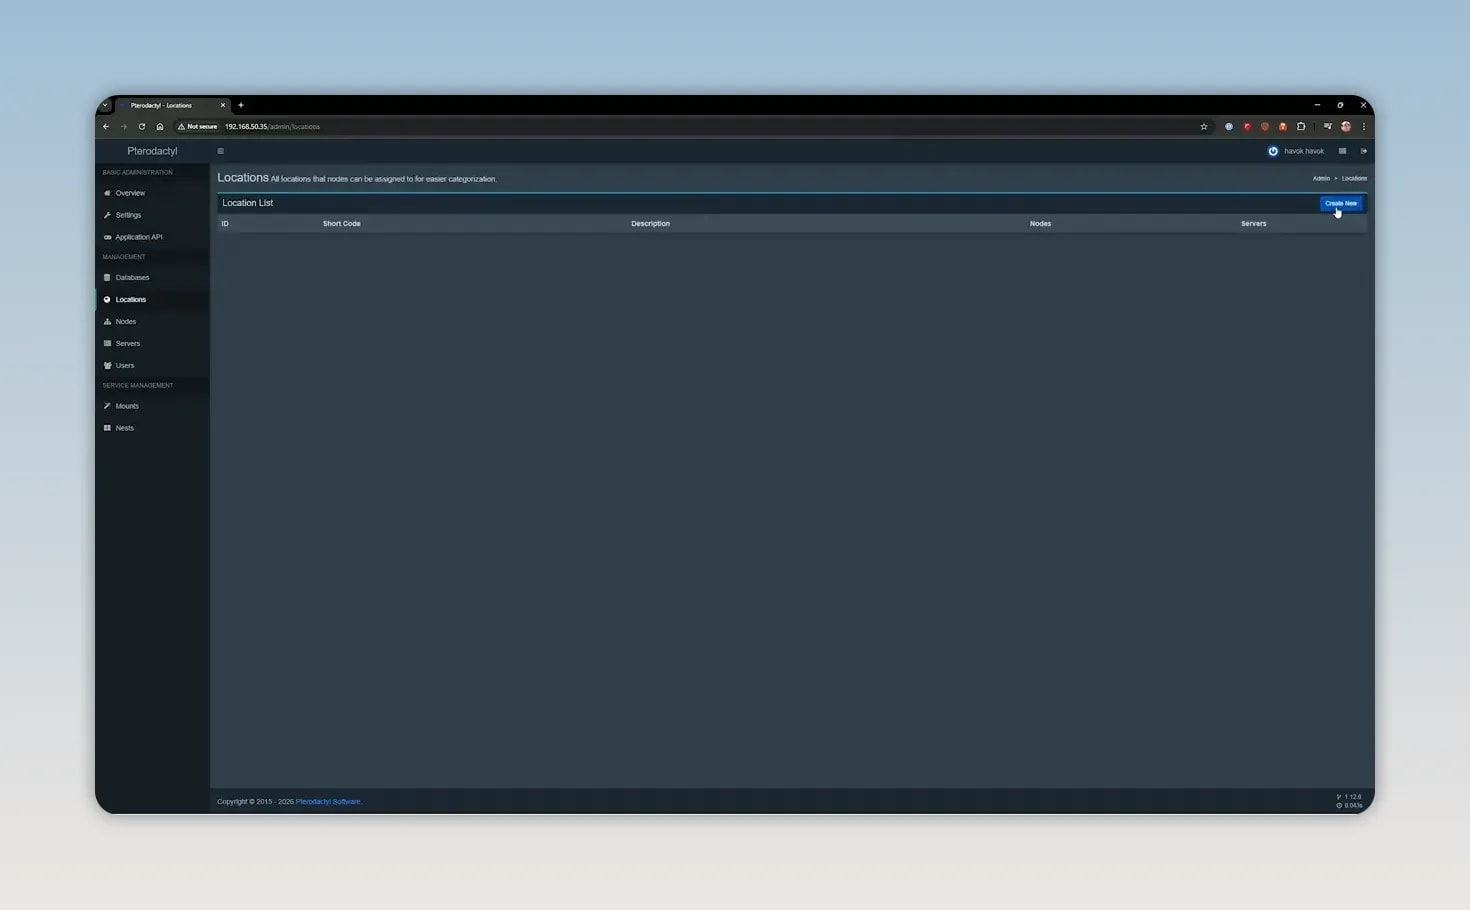
Start by creating a location. Think of this as an organizational label for where your nodes live. Naming it something like homelab keeps things simple.
🧠 Step 7: Create the node for the Raspberry Pi
Next, create a node. In Pterodactyl terms, the node represents the machine and resources that will host your game servers.
When creating the node, you will define:
- Name of the node
- Location you just created
- Public or private visibility
- Domain or IP address
- HTTP or HTTPS depending on whether you are using SSL
- Total memory available for servers
- Total disk available for servers
For this Raspberry Pi setup, only a small amount of RAM was allocated because the goal was simply to prove the concept, not to max out the box.
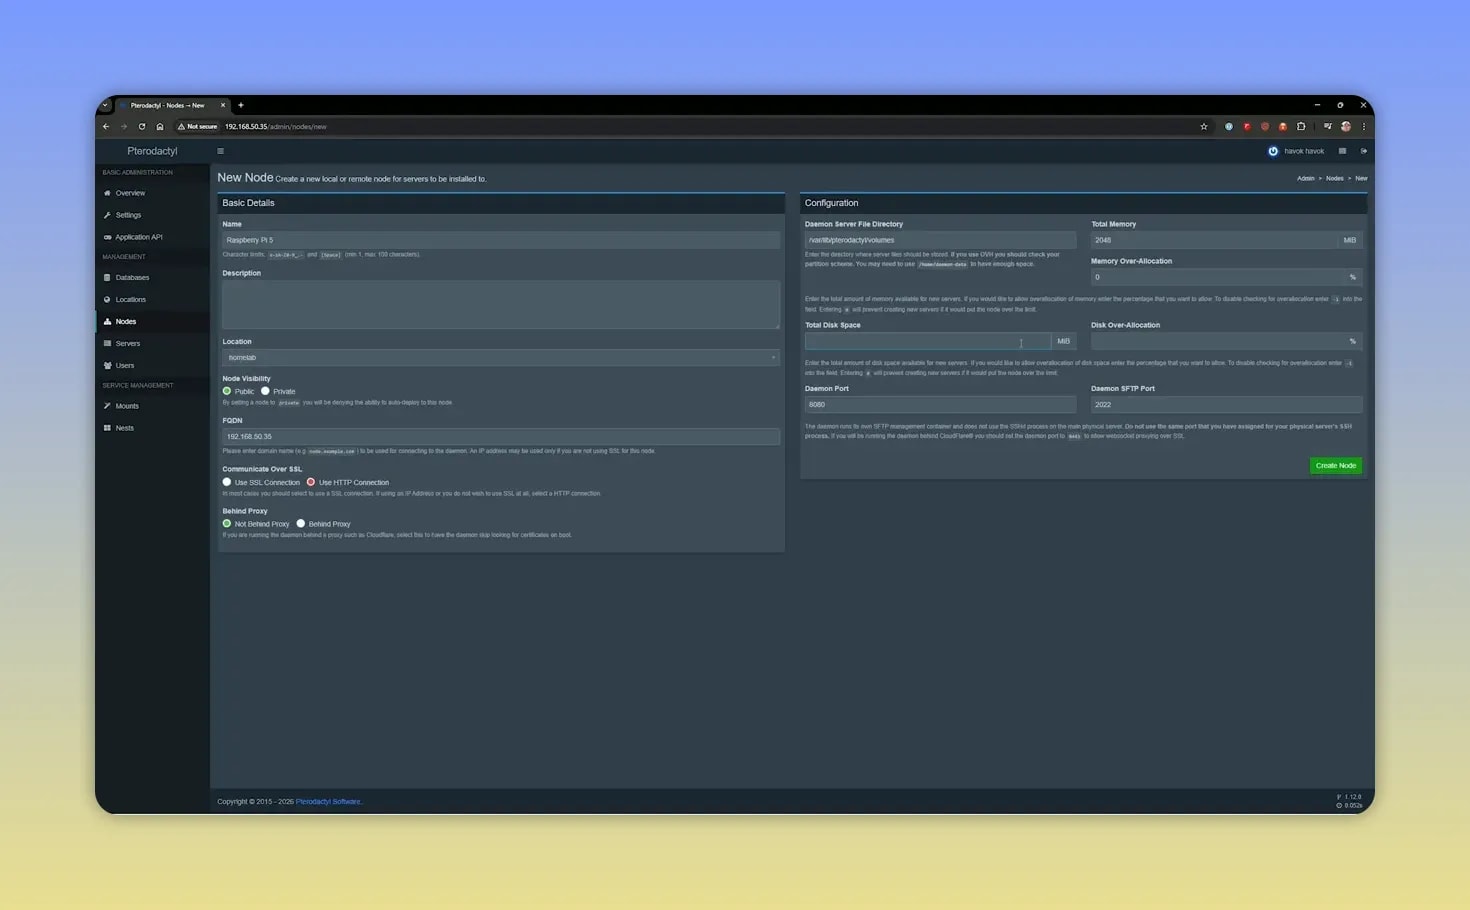
After that, add the Pi’s IP address and a port allocation. The default Minecraft port is typically 25565, and that is what was used here.
🪽 Step 8: Generate the Wings config and restart Wings
Once the node exists, Pterodactyl provides a generated configuration block for Wings. This has to be copied into a config.yml file on the Pi.
Open the config file in the Wings directory.
sudo nano wings/config.ymlPaste in the generated configuration exactly as provided, then save it. The most important thing to double check is the remote server section so it points to the right panel address.
When the file is saved, restart Wings.
docker compose restart wingsBack in the panel, the red heartbeat on the node should turn green. That is the signal that the panel and Wings are finally talking properly.
🎮 Step 9: Create the Minecraft server
Now it is time to create the actual server entry inside Pterodactyl.
When filling out the server form:
- Use the admin email you created earlier as the owner
- Select the Raspberry Pi node
- Choose the allocation you created
- Set memory and disk limits based on what you want the server to use
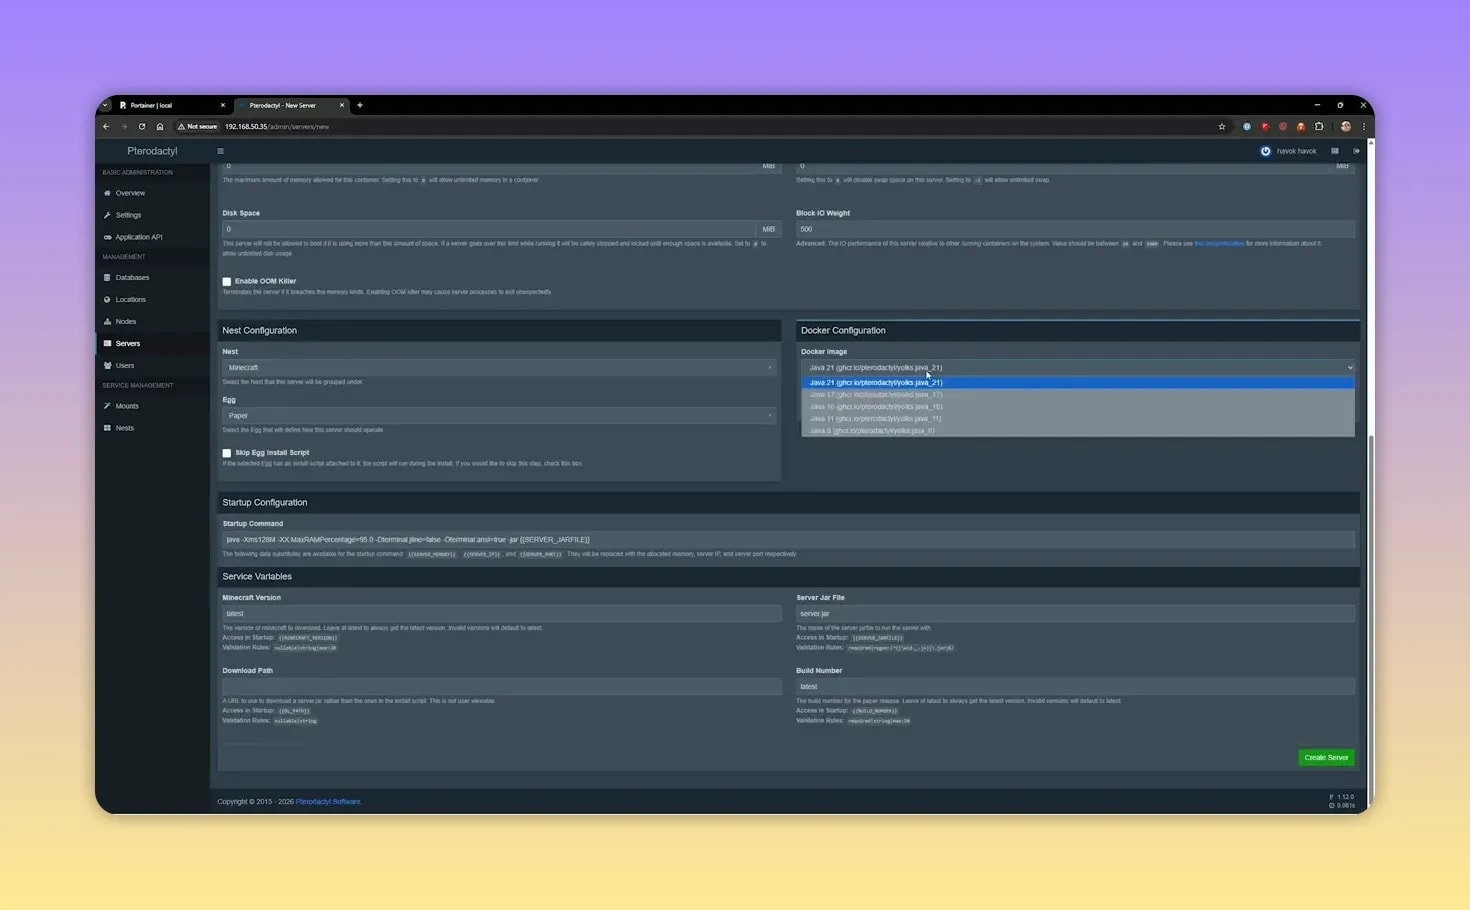
- Choose Minecraft Paper as the egg
The important architecture note here is that Paper works on ARM, which makes it the practical choice for a Raspberry Pi.
There is one more detail that matters a lot. The Java image selected by default may not work. In this setup, Java 21 did not work on the Raspberry Pi, so it had to be switched to Java 17.
🛠️ Step 10: Fix the missing server.jar error
After the server is created, the first startup may fail with an error saying it cannot access server.jar. On this Raspberry Pi Docker setup, that came down to file ownership and permissions.
The fix requires grabbing the server UID from the server list in Pterodactyl and using it in a terminal command that corrects the server files on disk.
The exact command used in the walkthrough is long and UID specific, but the workflow is straightforward:
- Copy the server UID from the panel.
- Paste that UID into the permission fix command.
- Run the command on the Pi.
- Return to the panel and start the server again.
cd /var/lib/pterodactyl/volumes/c1ccca6f-3d90-4ac2-ae99-cdfb1f766339
sudo curl -L -o server.jar https://api.papermc.io/v2/projects/paper/versions/1.20.1/builds/196/downloads/paper-1.20.1-196.jar
echo "eula=true" | sudo tee eula.txt
sudo chown -R root:root .
After that, the server should begin downloading the proper image, patching files, loading libraries, and generating the world.
📊 Step 11: Start the server and confirm it is working
Once the fix is applied, start the server again in the Pterodactyl console.
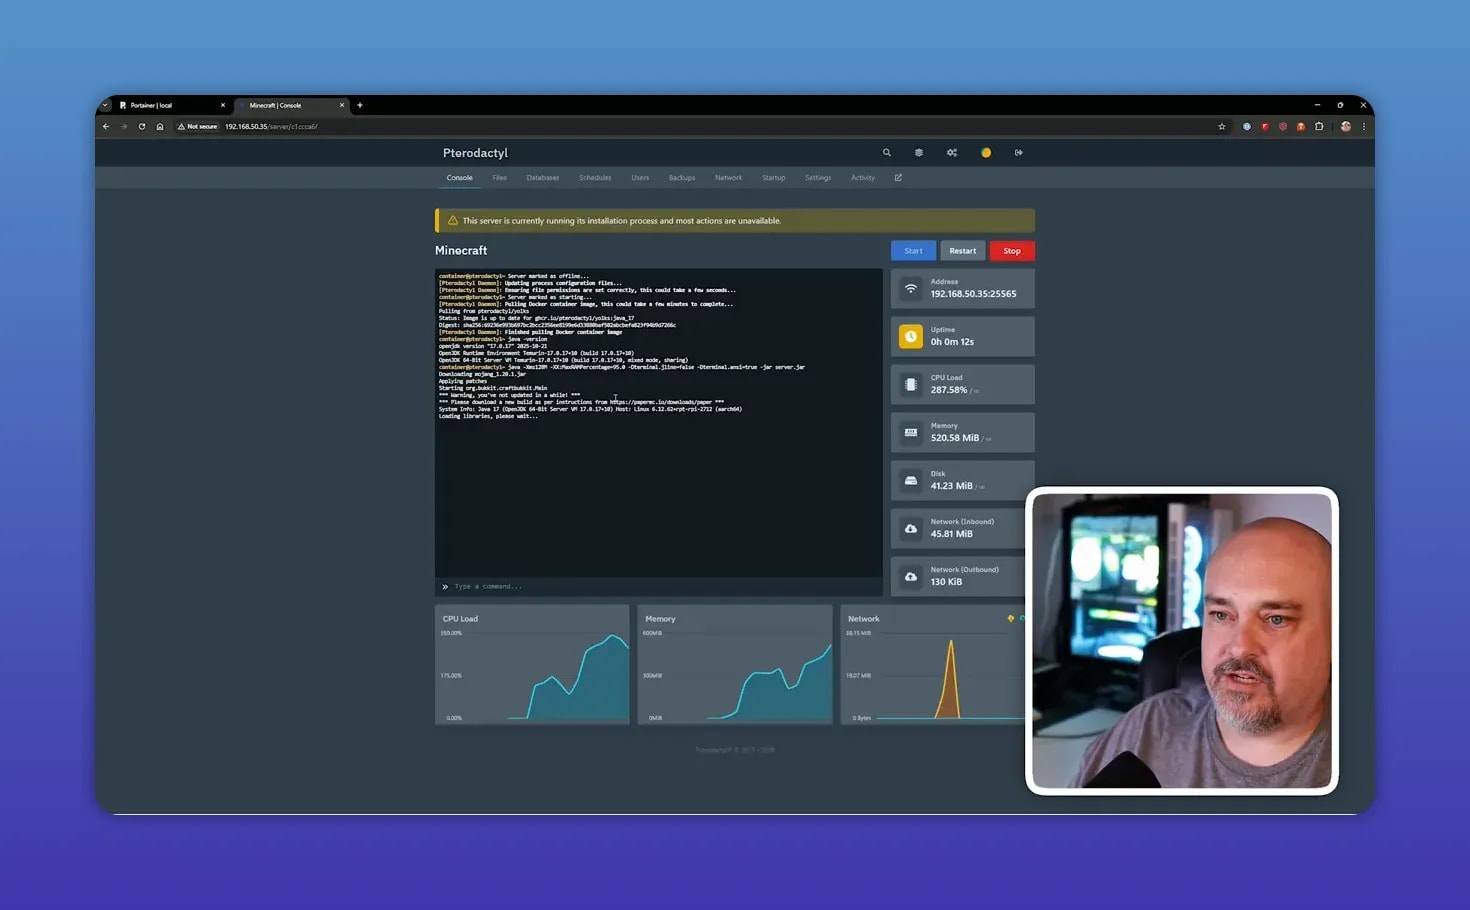
You should see the console move through the normal startup process:
- Server files download
- Patches are applied
- Libraries are loaded
- World generation begins
- CPU, memory, and network stats appear in the side panels
One thing becomes obvious immediately: Minecraft is CPU heavy. On the Pi, spikes are noticeable, especially during world generation. That is expected.
🕹️ Step 12: Connect from Minecraft
To join the server, copy the IP and port from Pterodactyl and add it inside Minecraft as a multiplayer server.
There is another gotcha here. Because the selected Paper build corresponds to an older Minecraft release, the Minecraft client may default to a newer version that will not connect properly. In this setup, a matching installation profile had to be created for the server version before connecting.
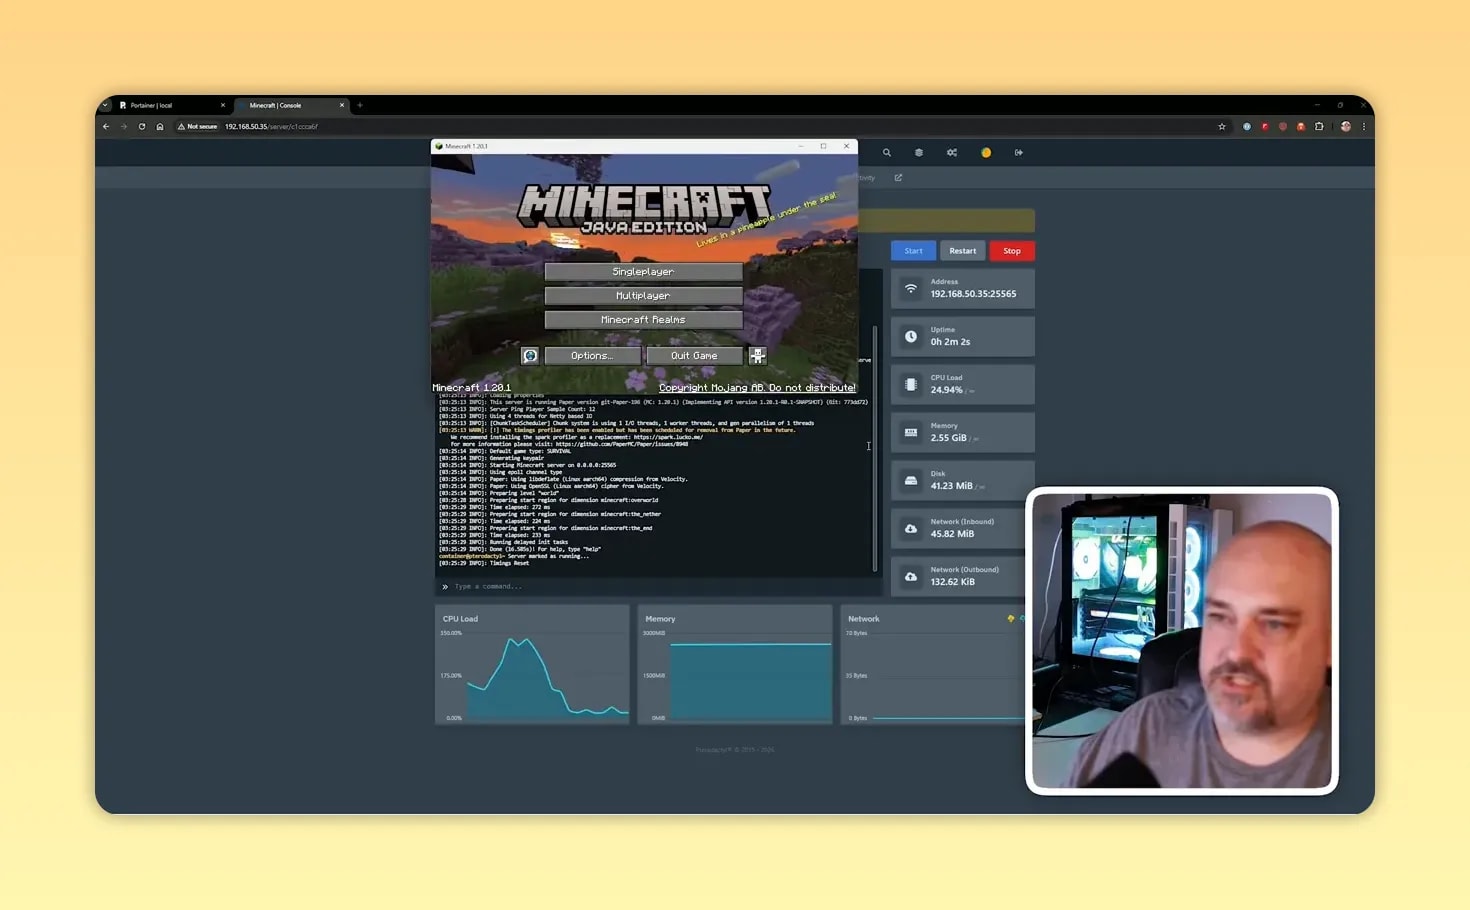
With the correct version selected, the connection works and the player loads into the world. The game runs, but you can absolutely tell the Raspberry Pi is working hard when chunks start generating.
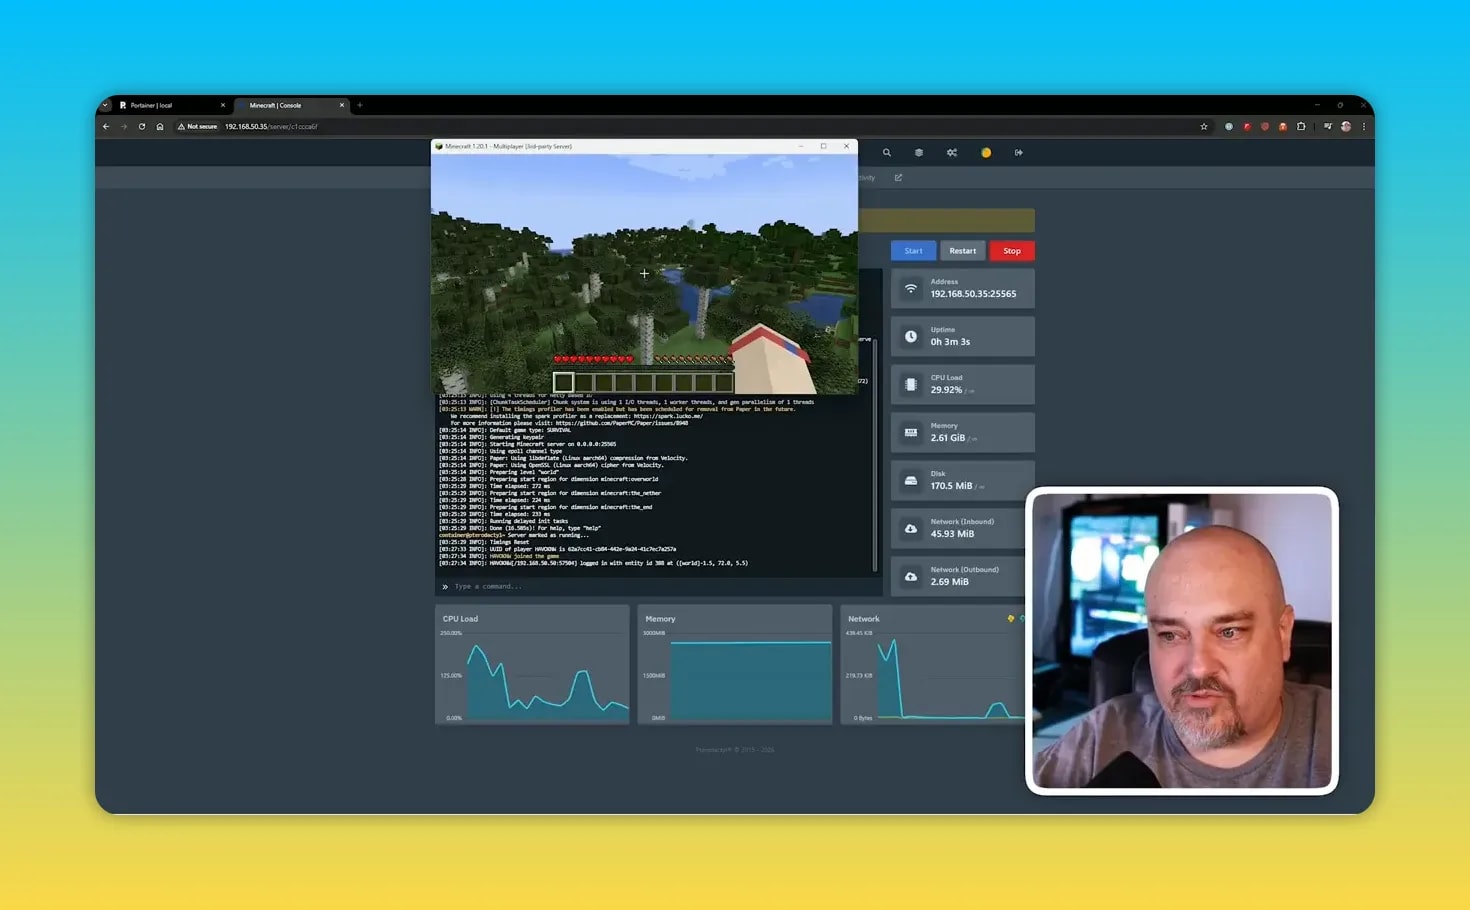
💾 Step 13: Back everything up
After putting in all this effort, the last thing you want is to lose the setup because of a bad SD card, broken update, or accidental mistake.
Create a backup script.
sudo nano backup.shThe script used here includes the database dump and archive process. The key thing you must change inside it is the database password so it matches the password from your compose file.
#!/bin/bash
# --- Configuration ---
BACKUP_DIR="./backups"
TIMESTAMP=$(date +"%Y-%m-%d_%H-%M-%S")
BACKUP_NAME="ptero_backup_$TIMESTAMP.tar.gz"
DB_PASSWORD="your_password" # Same as in docker-compose.yml

# Create backup directory if it doesn't exist
mkdir -p $BACKUP_DIR

echo "Starting backup of Pterodactyl..."

# 1. Dump the Database
echo "Dumping database..."
docker compose exec -T database mariadb-dump -u pterodactyl -p"$DB_PASSWORD" panel > ./panel_db_dump.sql

# 2. Compress everything (Config, DB dump, and Game Worlds)
echo "Compressing files... (this may take a minute)"
sudo tar -czf $BACKUP_DIR/$BACKUP_NAME
    ./docker-compose.yml
    ./setup.sh
    ./panel_db_dump.sql
    ./wings/config.yml
    /var/lib/pterodactyl/volumes

# 3. Cleanup temporary SQL file
rm ./panel_db_dump.sql

echo "✅ Backup complete: $BACKUP_DIR/$BACKUP_NAME"
Once the script is saved, make it executable.
sudo chmod +x backup.shThen run it.
sudo bash backup.sh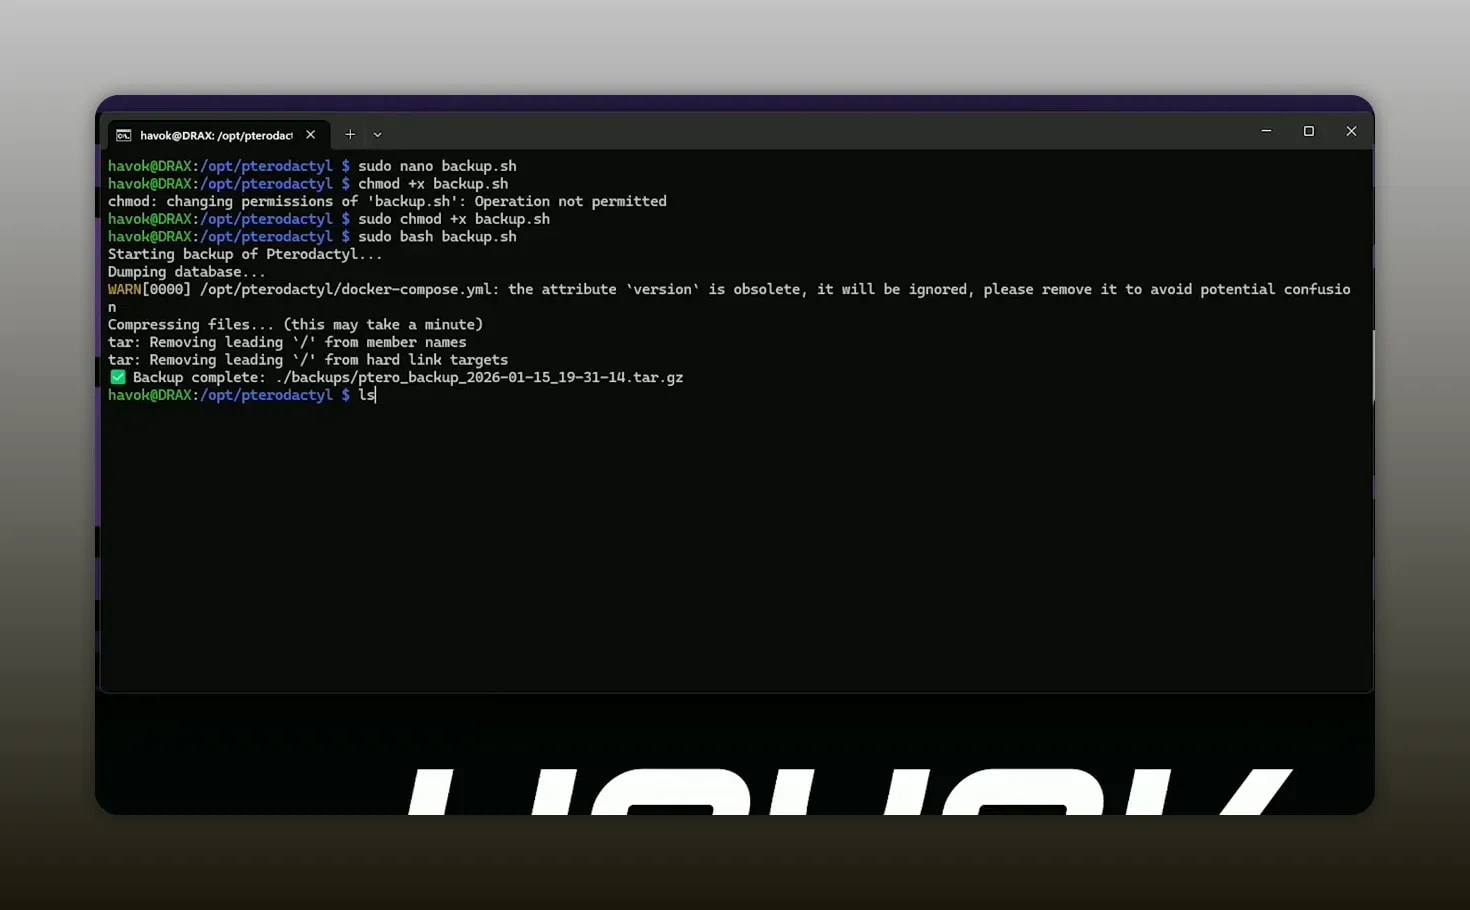
The backup process creates a dated file in a backups directory. If you want, you can point that output to a network drive or another storage target. For long term reliability, that is the smarter move. If you already use cloud backup for home lab data, something like off device storage is worth considering.
🧪 What worked and what to expect
So, can a Raspberry Pi 5 run Pterodactyl in Docker and host a Minecraft server?
Yes.
But the better answer is this:
- It is a great learning project.
- It is a fun homelab build.
- It proves out the workflow for self hosted game server management.
- It is not ideal for a large, heavily used, always on public Minecraft world.
If your main goal is to understand Pterodactyl, Docker, Wings, and Minecraft hosting on ARM hardware, this is a really solid exercise. If your main goal is raw performance, you will want stronger hardware or a VPS.
For reference, if you later move beyond a Pi and want a hosted option, a VPS is the more practical direction for a public facing setup.
❓FAQ
Can a Raspberry Pi 5 really run a Minecraft server with Pterodactyl?
Yes. It can run Pterodactyl in Docker, connect Wings, and host a Paper Minecraft server. The main limitation is performance, especially when generating new world chunks.
Is this a good production setup for lots of players?
No. This is much better suited to a home lab, testing, or a small private server. A public server with many active players should be moved to stronger hardware.
Why use Paper instead of another Minecraft server type?
Paper was chosen because it works with the ARM architecture used by the Raspberry Pi, making it the practical option for this build.
Why was Java 17 used instead of Java 21?
In this setup, Java 21 did not work properly on the Raspberry Pi. Switching the Docker image to Java 17 solved that compatibility problem.
What if the panel shows a database related error after startup?
The panel image may be missing the MySQL client tools needed for this setup. Installing the client inside the panel container and then running the schema import and migrations fixes that issue.
How do I protect this setup after everything is working?
Create a backup script, verify it makes timestamped archives, and store those backups somewhere outside the Pi if possible. That matters even more if you are using microSD storage.
Visit HAVOK on Discord to connect with our community, share your Raspberry Pi stories, and explore more tech inspirations.
*If you buy something through any of the links featured in this article I may get a small share of the sale.