


If you have code scattered across text files, random notes, half-finished editor tabs, and old Docker Compose scraps, you are not alone. That mess adds up fast. A clean way to fix it is to install Bytestash with Docker and keep everything in one searchable, self-hosted place.
Bytestash is an open source snippet manager that works really well for all those little bits of code you know you need later, but never remember where you put them. Think Docker Compose files, YAML fragments, HTML snippets, automation scripts, environment examples, and all the other odds and ends that usually end up living in chaos.
This guide walks through how to install Bytestash with Docker, how to deploy it with Portainer or the command line, and what to configure after the first login so it actually becomes useful right away.
🧩 Why Bytestash is worth self-hosting
The big win with Bytestash is simple. It gives you a dedicated place for code snippets instead of stuffing them into cloud notes, loose documents, or editor tabs you swear you will clean up later.
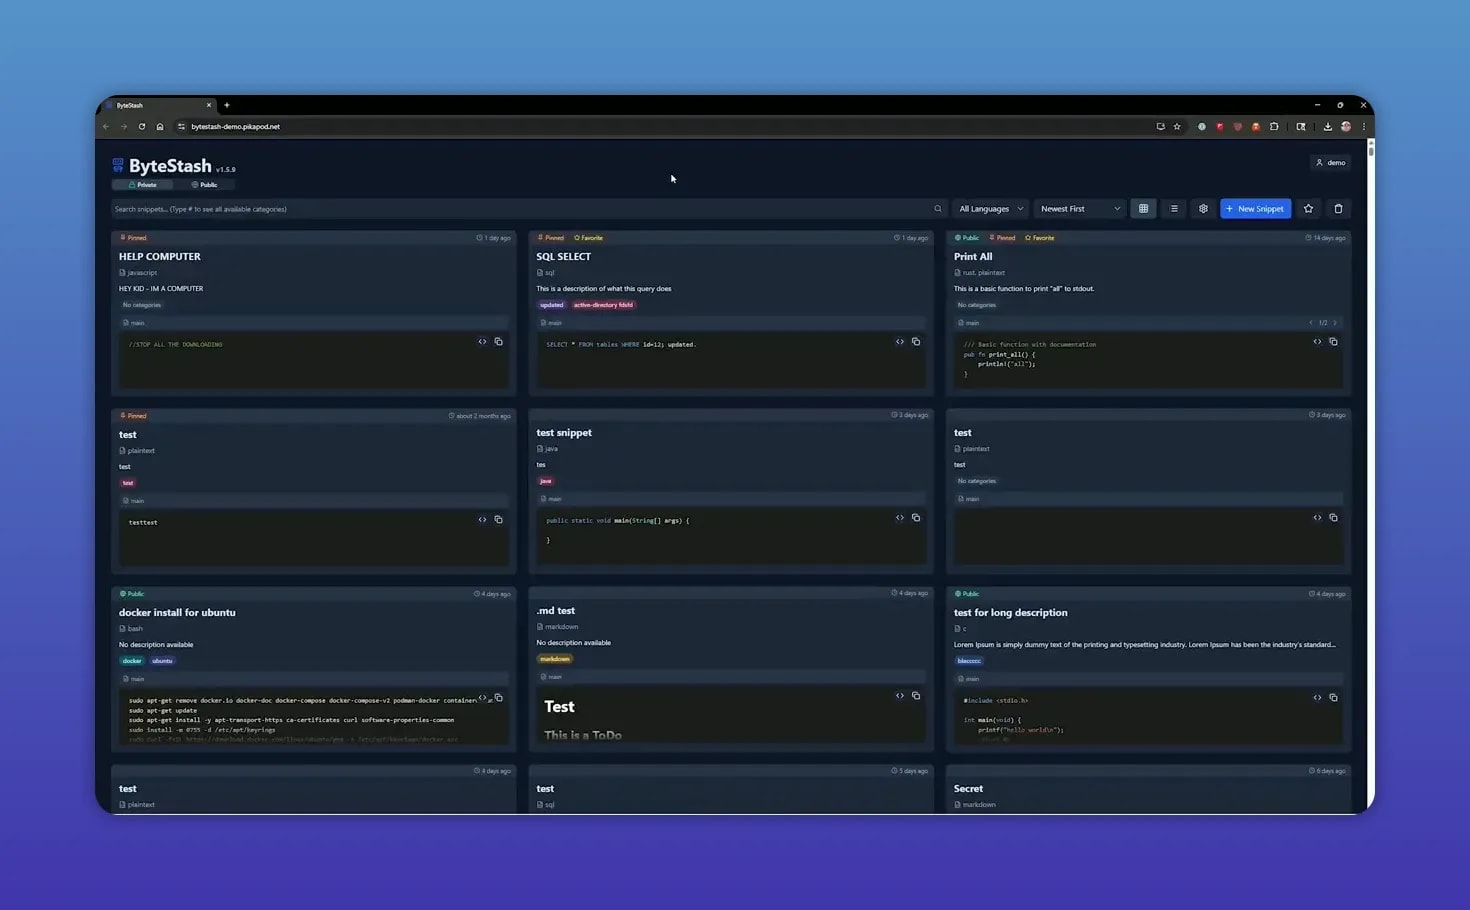
Once you install Bytestash with Docker, you get a lightweight interface for storing snippets privately, organizing them by language and category, and searching both titles and code content. That last part matters a lot when you remember a variable name or command, but not the snippet title.
It fits especially well in a homelab setup because it is:
- Self-hosted, so your notes and snippets stay under your control
- Open source, which makes it easy to trust and customize
- Fast and lightweight, so it does not need a huge stack to run
- Practical, especially for Docker, YAML, HTML, automation, and infrastructure snippets
If you are already into self-hosting projects, you might also like browsing the broader tutorials on the Tech For Good homepage for more homelab and automation ideas.
📦 What you need before you install Bytestash with Docker
Before you begin, make sure you have:
- A server, VPS, or homelab machine with Docker installed
- Docker Compose support
- Optional access to Portainer if you prefer a UI-based deployment
- A browser so you can open the Bytestash web interface after deployment
If you are hosting this on a remote box, a VPS can be a solid option. A provider mentioned for this setup is VPS hosting, especially if you want something inexpensive for small self-hosted services.
You may also want the official Docker references handy if you are new to Compose. The Docker Compose documentation is a good supporting reference.
🌐 Get the Docker Compose file from GitHub
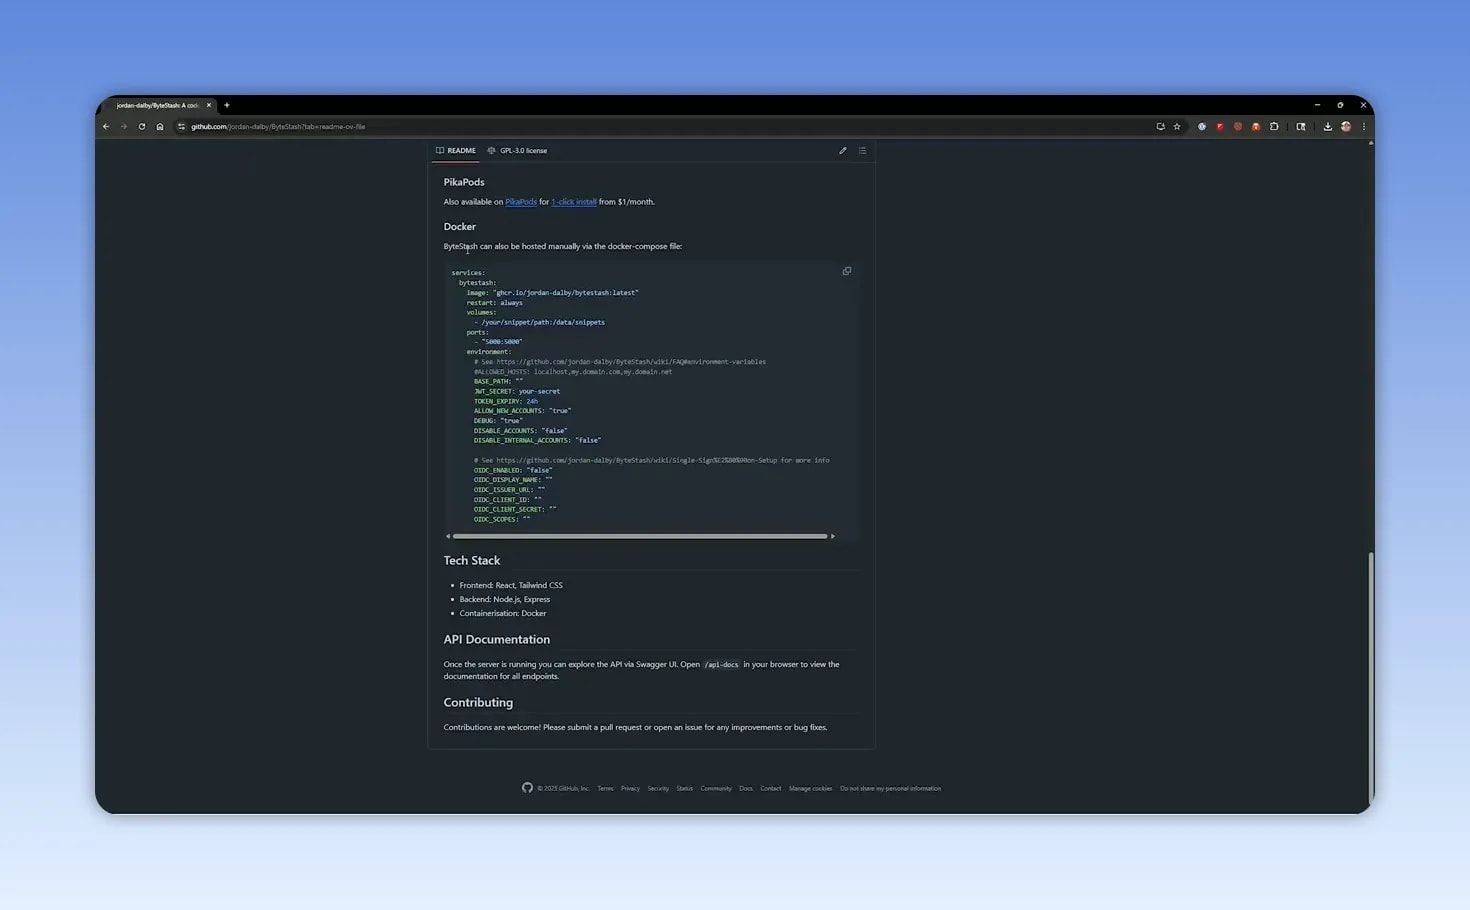
The quickest way to install Bytestash with Docker is to use the project’s provided Compose example from its GitHub page. The repository includes a ready-to-use stack, along with environment variable details and some extra notes such as an Unraid option and demo information.
services:
  bytestash:
    image: "ghcr.io/jordan-dalby/bytestash:latest"
    restart: always
    volumes:
      - /your/snippet/path:/data/snippets
    ports:
      - "5000:5000"
    environment:
      # See https://github.com/jordan-dalby/ByteStash/wiki/FAQ#environment-variables
      #ALLOWED_HOSTS: localhost,my.domain.com,my.domain.net
      BASE_PATH: ""
      JWT_SECRET: your-secret
      TOKEN_EXPIRY: 24h
      ALLOW_NEW_ACCOUNTS: "true"
      DEBUG: "true"
      DISABLE_ACCOUNTS: "false"
      DISABLE_INTERNAL_ACCOUNTS: "false"

      # See https://github.com/jordan-dalby/ByteStash/wiki/Single-Sign%E2%80%90on-Setup for more info
      OIDC_ENABLED: "false"
      OIDC_DISPLAY_NAME: ""
      OIDC_ISSUER_URL: ""
      OIDC_CLIENT_ID: ""
      OIDC_CLIENT_SECRET: ""
      OIDC_SCOPES: ""
The key thing to grab is the Docker Compose example. That file includes the Bytestash image, restart behavior, volume definitions, port mapping, and the environment variable structure.
When reviewing the project docs, pay attention to the environment settings. A few important ones are:
- Base path, if you want Bytestash available from a subpath on your domain
- Allow signups, which should usually be disabled for a private install
- Disable accounts, if you want to lock user access down further
- Disable internal accounts, useful if you plan to rely on SSO
For most private homelab installs, keeping things simple is the right move. Leave the base path blank unless you specifically need a subpath, and turn off public signup if the instance is only for you.
🖥️ Install Bytestash with Docker in Portainer
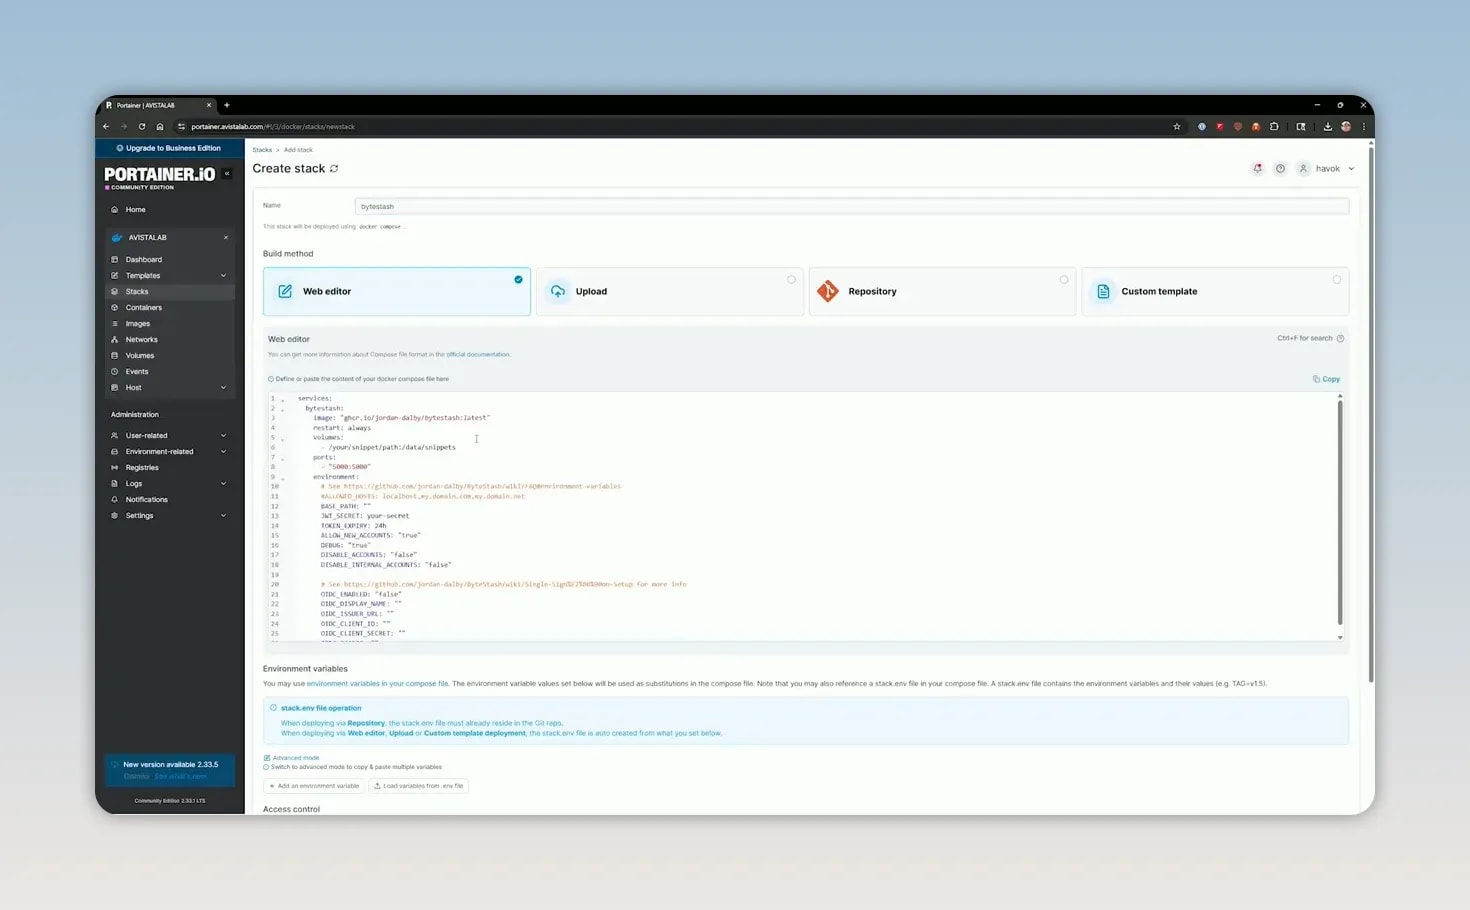
If you prefer a graphical workflow, Portainer makes this pretty straightforward.
- Open Portainer and select your Docker node.
- Go to Stacks.
- Click Add stack.
- Use the Web editor.
- Give the stack a name such as bytestash.
- Paste in the Docker Compose content from GitHub.
- Review ports, volumes, and environment variables.
- Deploy the stack.
The default mapping exposes the app on port 5000, so after deployment the web interface should be reachable at your server IP followed by :5000.
Portainer works fine here, especially if you like keeping all your app stacks visible in one place. That said, if you are more comfortable with shell access, the terminal method is just as easy and a bit cleaner for long-term maintenance.
⌨️ Install Bytestash with Docker from the terminal
This is the approach I usually prefer. It is direct, predictable, and keeps each app neatly organized in its own folder.
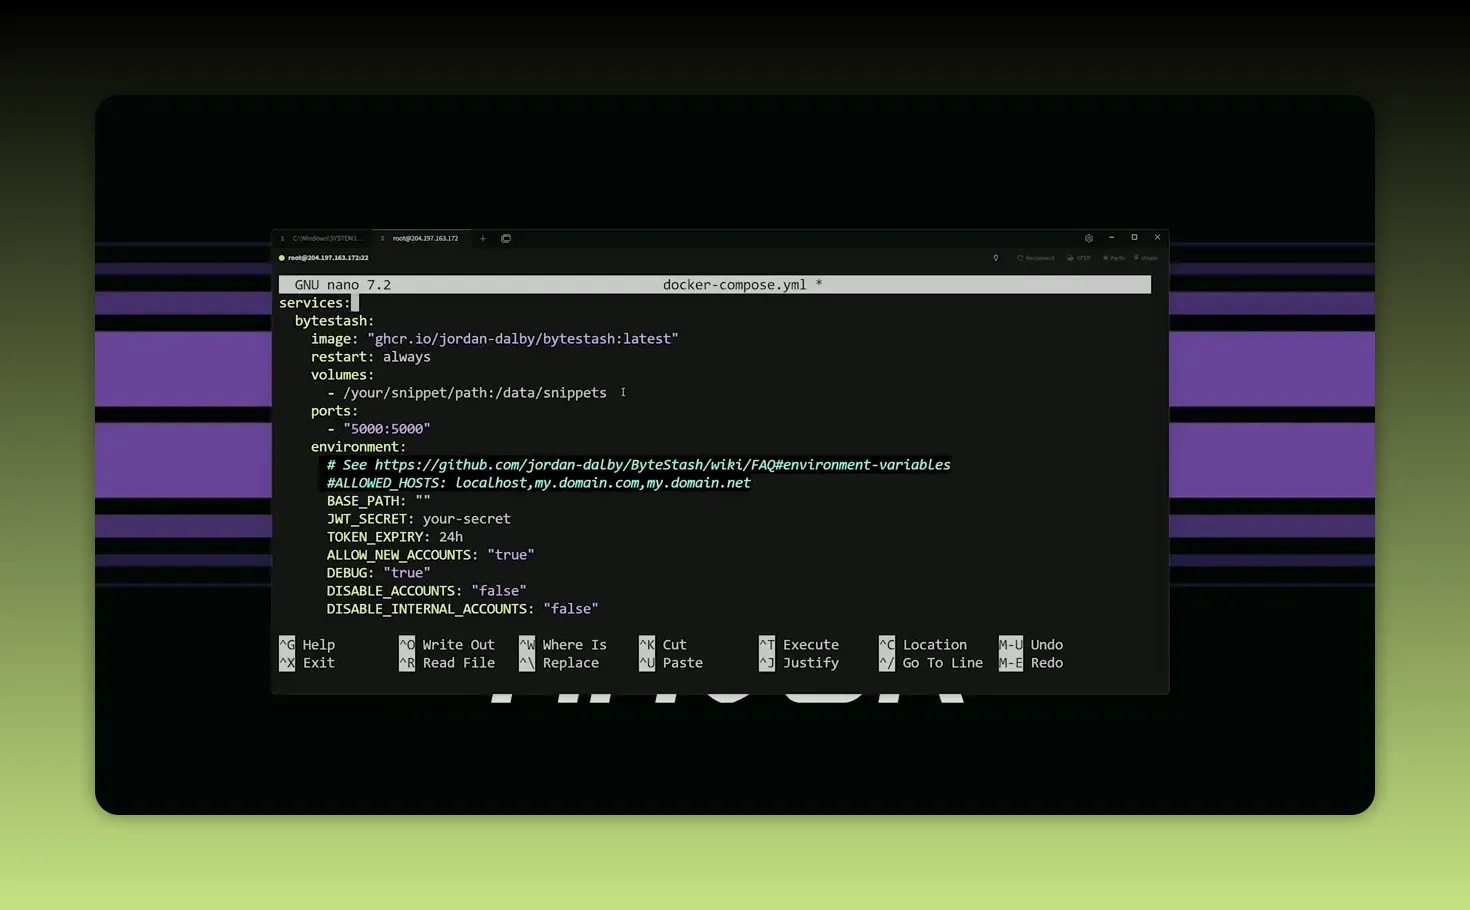
Create a dedicated directory for the app, move into it, and create your Compose file:
mkdir -p ~/docker/ByteStash
cd ~/docker/ByteStash
nano docker-compose.yaml
Paste the Compose content from the project page into that file, save it, and then start the stack:
docker compose up -dThat command reads the YAML file and launches the service in detached mode.
If your environment still uses the older Compose syntax, this variant may also work:
docker-compose up -dAfter that, Bytestash should be running on your server.
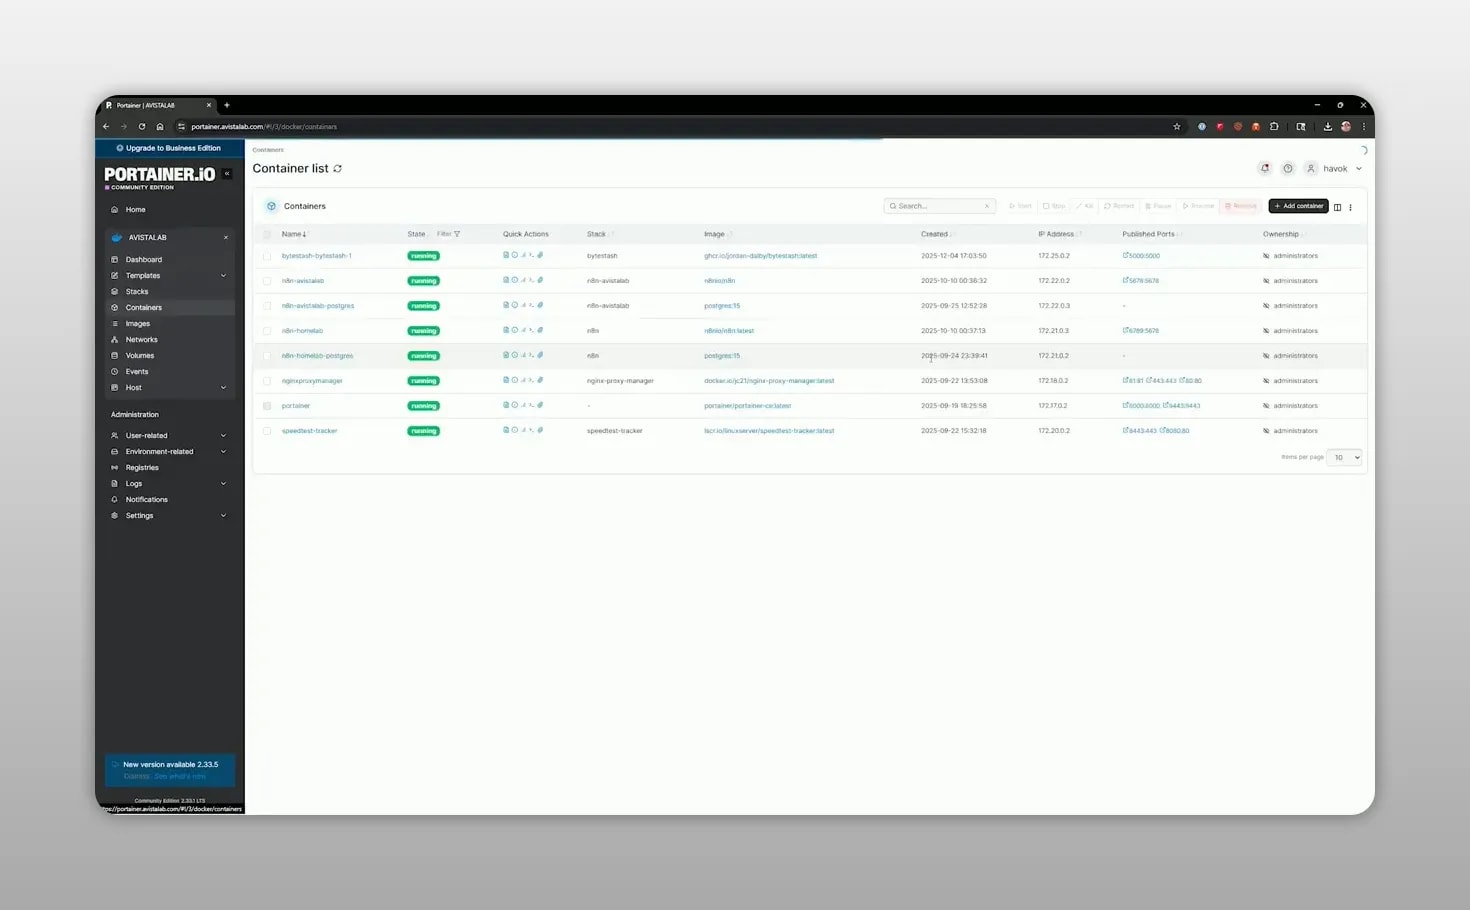
Verify that the container is running
You can confirm the deployment from the terminal with:
docker psOr, if you already use Portainer, you can refresh the container list and confirm that the Bytestash container is up and attached to port 5000.
🔐 First login after you install Bytestash with Docker
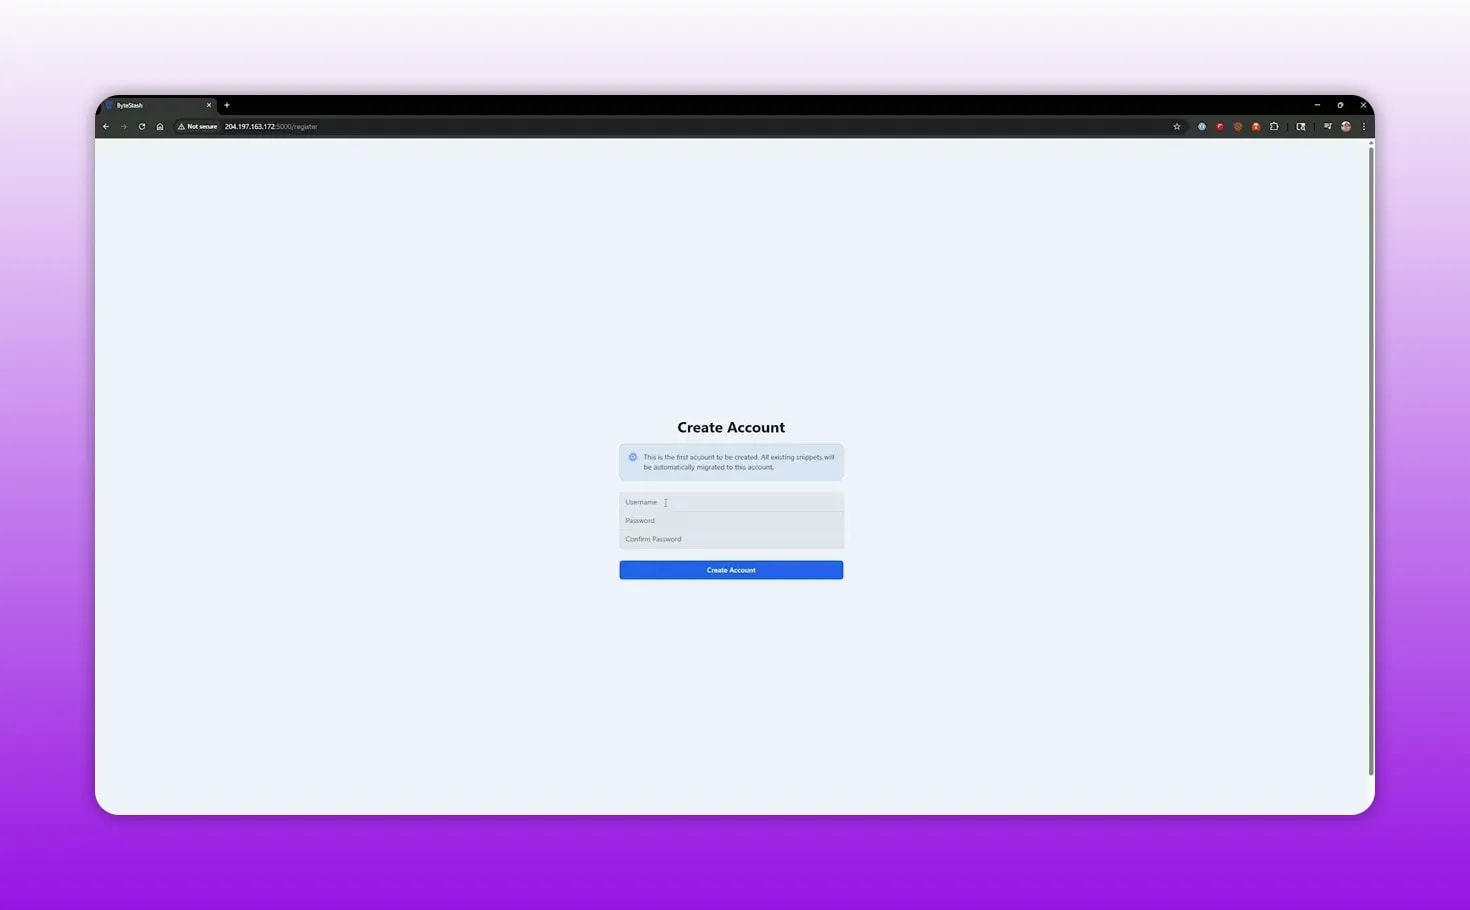
Once the container is running, open your browser and go to your server address on port 5000:
http://your-server-ip:5000On first launch, Bytestash asks you to create the first account. Enter:
- Username
- Password
- Password confirmation
That initial account becomes your first way into the system, so use a strong password. If you need help making one quickly, a simple password generator can help.
⚙️ Settings worth changing right away
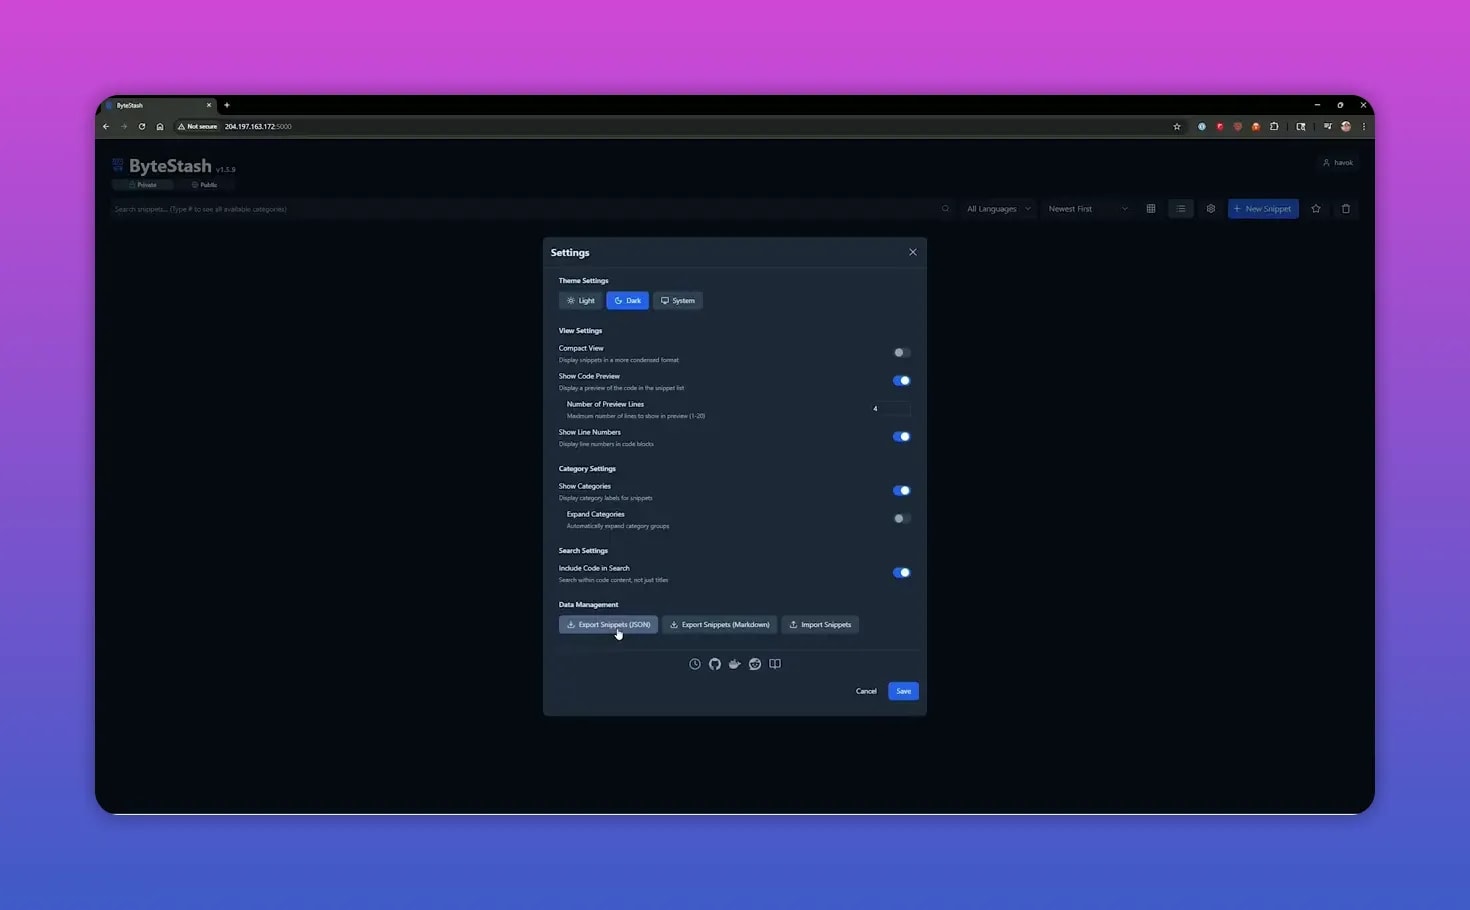
After the first login, the default dashboard is pretty bare, which is exactly what you want. Before adding snippets, it is worth visiting the settings panel and adjusting a few things.
Dark mode
If you spend a lot of time around terminals, YAML, and code editors, dark mode will probably feel better immediately.
Private vs public snippets
Bytestash separates snippets into private and public visibility. Private snippets are tied to your account. Public snippets are readable by others.
For most people running this at home, private is the default you will want. If you later expose the service through something like a tunnel or reverse proxy for coworkers or friends, public snippets can become useful for sharing common code.
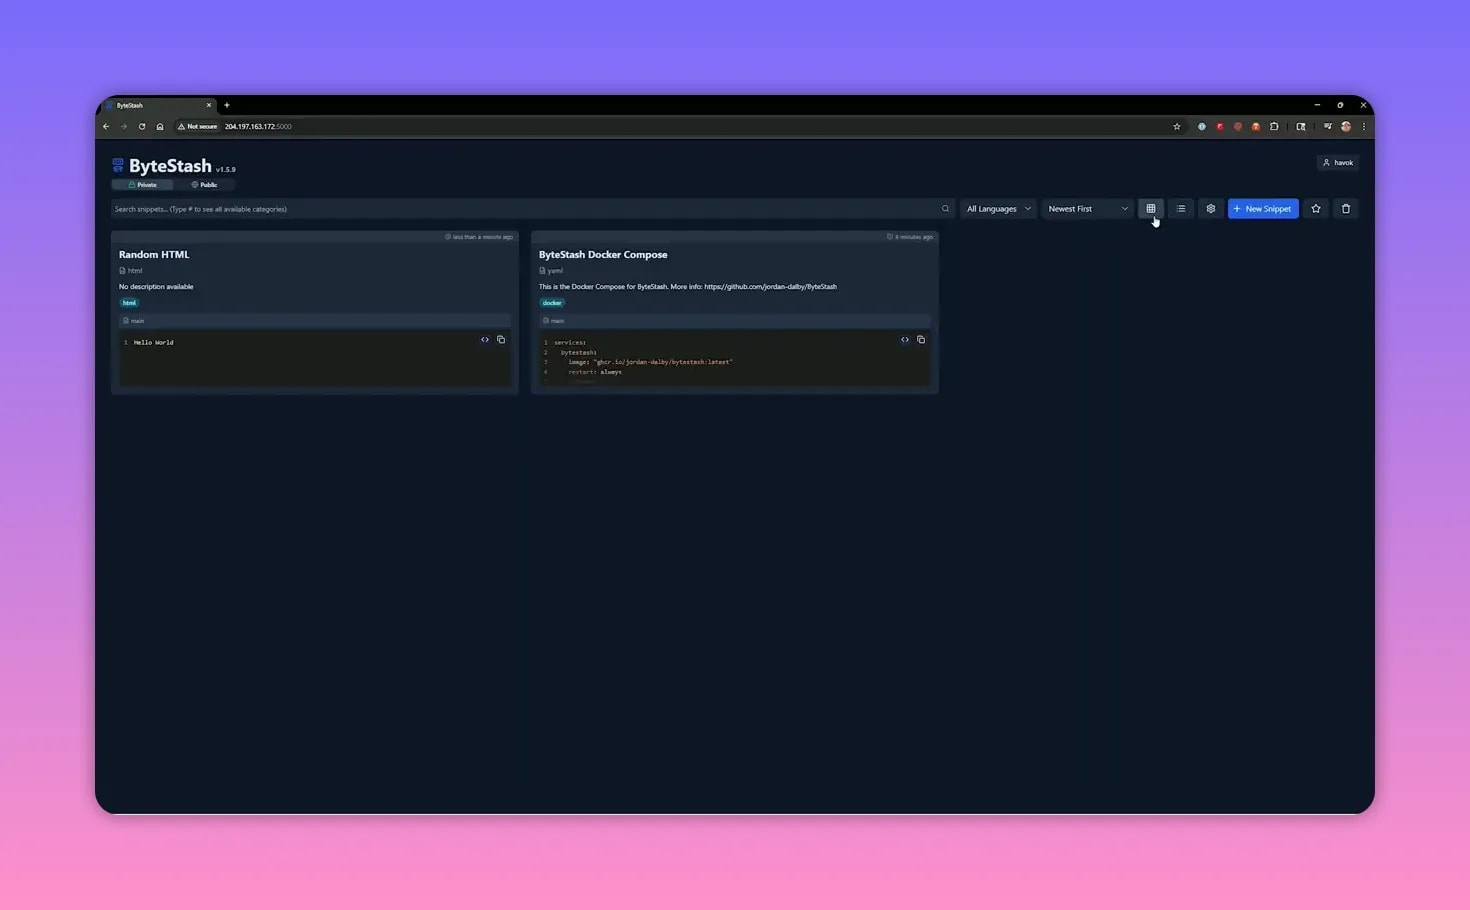
Compact view and preview options
You can make the dashboard denser by turning on compact view. You can also control whether snippet previews are shown and how many lines appear in those previews.
Line numbers
Line numbers are a great toggle to enable, especially for longer snippets or configs where you are trying to reference a specific section quickly.
Search inside code
This one is huge. If you often forget the titles of saved snippets, enable the option to include code contents in search results. That way you can search for a variable name, command, or phrase that appears inside the snippet itself.
Data export and import
Bytestash can export your content to formats like JSON and Markdown, and it can also import snippets. That makes it more practical as a long-term home for your notes instead of a dead-end tool.
🗂️ How to add your first snippet
After you install Bytestash with Docker, the real value shows up when you start moving your scattered snippets into it.
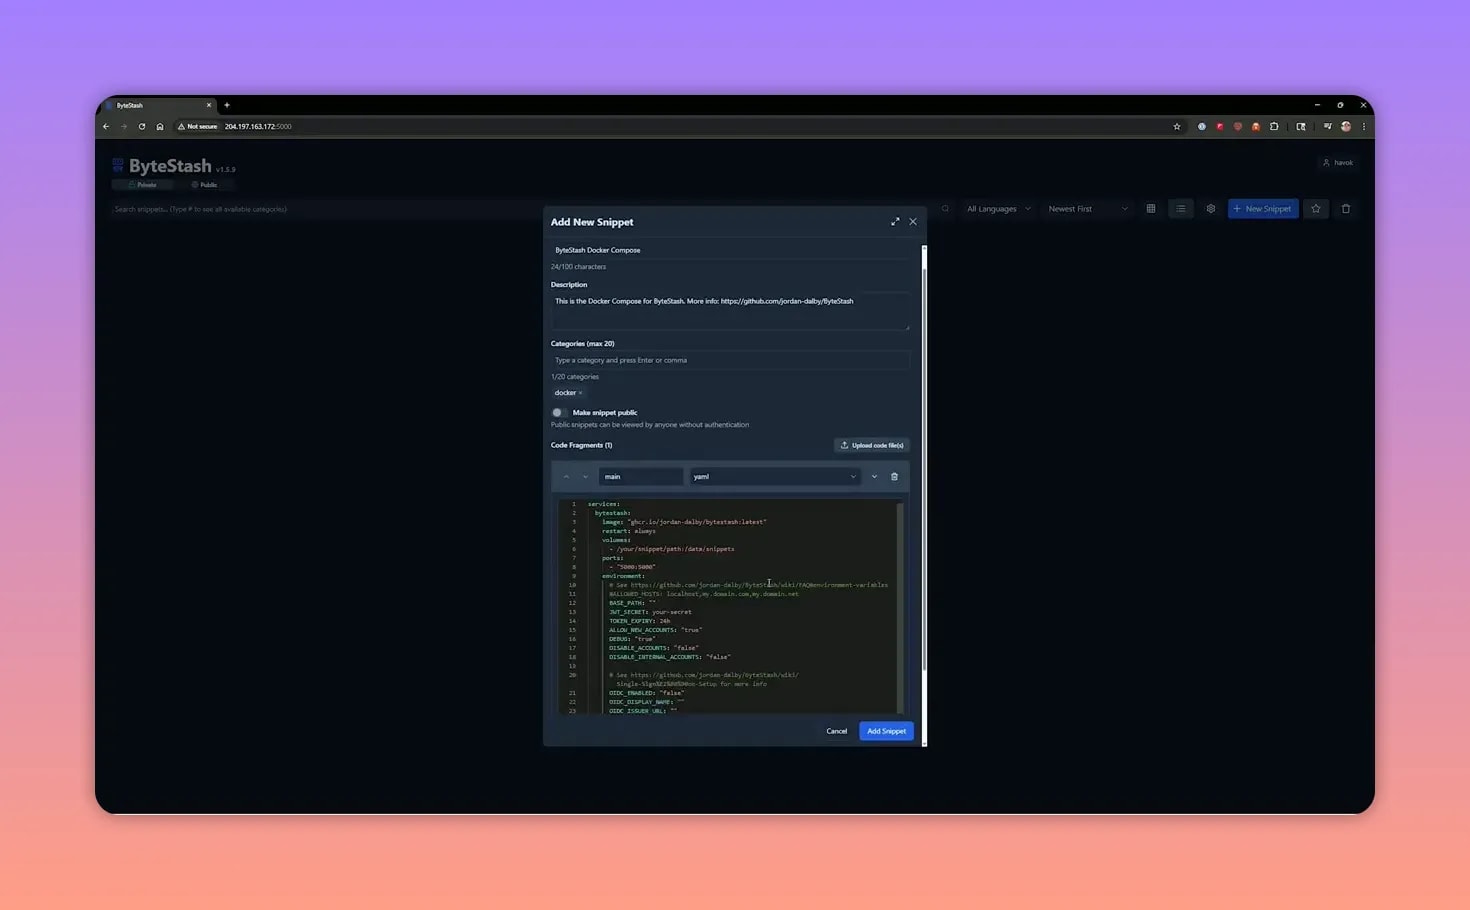
To create a new snippet, use the new snippet button and fill out the main fields:
- Title
- Description
- More info link
- Category
- Visibility
- Language
- Code body
A good first test is saving the same Docker Compose file you used for setup. Give it a clear title like your Bytestash Compose config, tag it with a category such as docker, choose YAML as the language, and paste the code into the editor.
You can also attach a link in the more info field if the snippet came from project documentation or a repo page.
🔎 Searching, sorting, and filtering snippets
Once you have more than a handful of snippets, organization matters a lot more than storage.
Bytestash gives you a few useful ways to manage the list:
- Search by title
- Search inside code content
- Filter by language
- Sort newest first
- Sort oldest first
- Sort alphabetically
You can also search by category using a hashtag style search. That is handy if you keep categories consistent, like docker, html, automation, or streamerbot.
If you are saving markup often, a tool like this pairs nicely with a Discord markdown generator for storing reusable formatting snippets in one place.
📄 Viewing, copying, and editing saved code
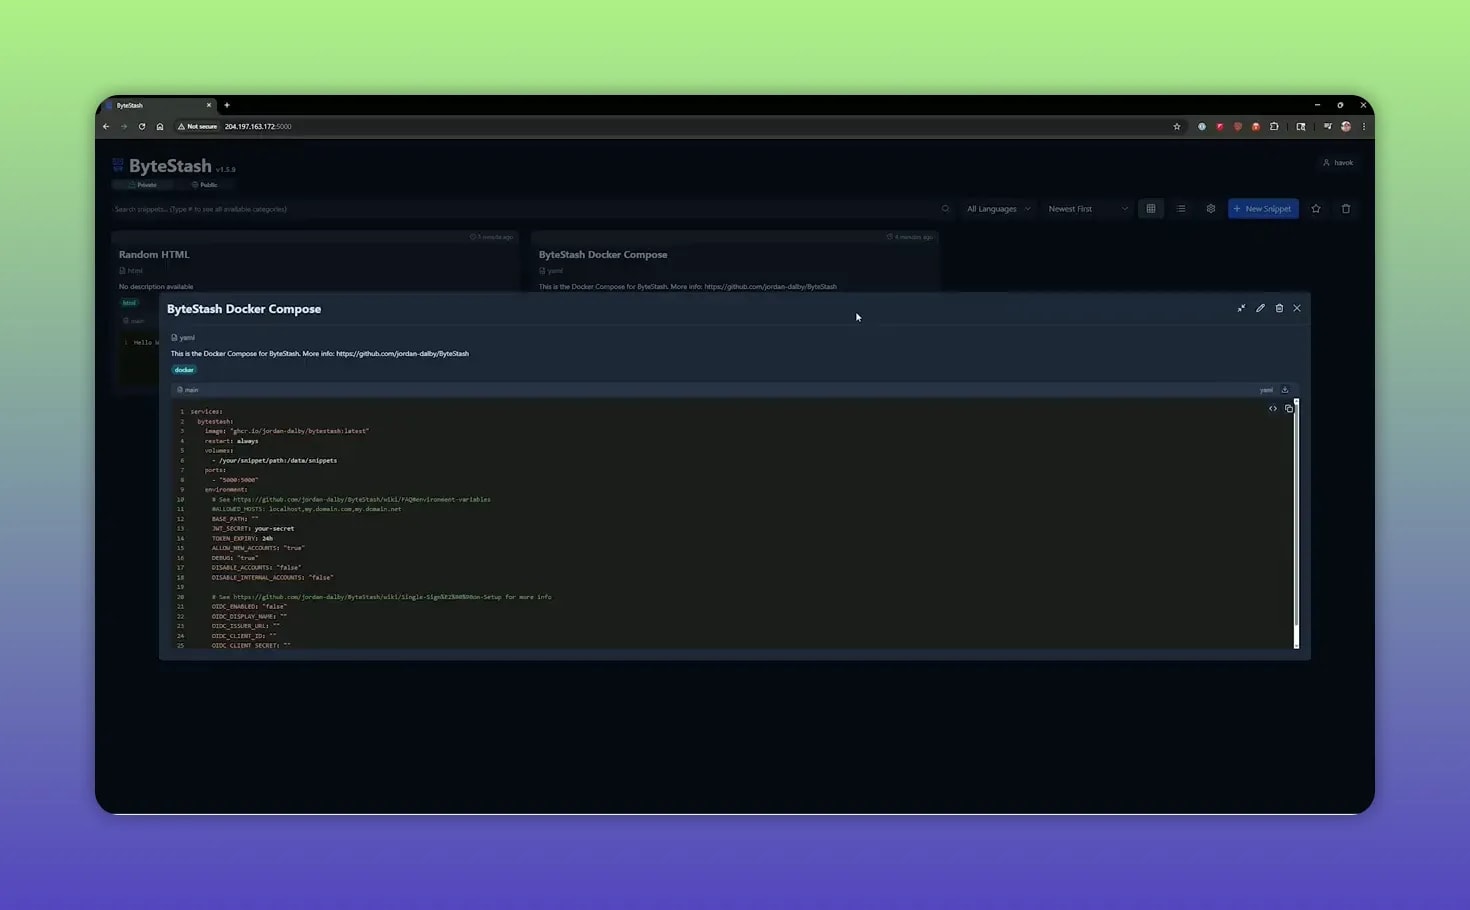
Open any snippet and you can:
- Read the saved metadata
- View the code with syntax highlighting
- Edit the snippet
- Expand the code view
- Delete the snippet
- Open the raw code view
- Copy the full contents with one click
The raw code view is especially nice when you want a plain version without any extra interface around it. Copying is quick too, which is exactly what you want from a snippet manager. Open it, grab what you need, and move on.
🧠 Small quirks to keep in mind
No tool is perfect, and there are a couple little things worth noting.
One quirk is the favorites filter. If you enable it, the interface may not make it immediately obvious why your other snippets disappeared. So if something seems missing, check whether you are only showing favorites.
There is also a recycle bin style behavior for deleted snippets. Instead of disappearing instantly forever, removed items stick around for about 30 days. That is a nice safety net if you delete something by mistake.
And if you plan to share an instance beyond your local network, go back and review your environment settings carefully. The account registration options matter much more once the app is exposed outside your private LAN.
🚀 Good ways to use Bytestash after you install it
After you install Bytestash with Docker, a few practical use cases stand out right away:
- Docker Compose files for your self-hosted apps
- Reverse proxy configs
- YAML for automation tools
- HTML snippets
- Shell commands you reuse all the time
- Environment variable examples
- Streamer bot or automation logic fragments
It also fits well alongside other self-hosted and AI-focused projects if you are building out a smarter lab. If that is your lane, the AI tutorials archive is worth a look for related setup ideas.
📚 Additional resources
If you want to make the setup more complete, these links can help:
- web hosting resources for broader hosting needs
- domain names if you want a cleaner address for your homelab services
- Linux time zone list for other server-side Docker deployments that need time zone values
- Discord community if you want to talk self-hosting, gaming, tech, and creator stuff with a like-minded group
❓FAQ
Do I need Portainer to install Bytestash with Docker?
No. Portainer is optional. You can deploy Bytestash either through the Portainer stack editor or directly from the terminal with Docker Compose.
What port does Bytestash use by default?
The setup shown here exposes Bytestash on port 5000, so you access it with your server IP followed by :5000.
Can I keep my snippets private?
Yes. Bytestash supports private snippets tied to your account, and that is the best default for most homelab installs.
Can Bytestash search inside code, not just titles?
Yes. There is a setting that lets search include the code contents, which is extremely useful when you remember part of a command or variable name but not the snippet title.
What kinds of snippets work best in Bytestash?
It works especially well for Docker Compose files, YAML, HTML, shell commands, automation snippets, and general infrastructure notes you reuse often.
Is Bytestash a good replacement for cloud notes?
If your main problem is organizing technical snippets and reusable code, yes. Bytestash is much better suited for that job than generic note apps.
Once you install Bytestash with Docker, the biggest difference is not the deployment itself. It is the fact that your useful code stops disappearing into random files and starts living in a system built for finding it again later. For a small self-hosted tool, that is a pretty big quality-of-life upgrade.
For further discussions, troubleshooting, and to connect with a vibrant community of like-minded tech enthusiasts, join the HAVOK community on our Discord server: HAVOK Discord server